Mastering Pose Changes: Stable Diffusion & ControlNet
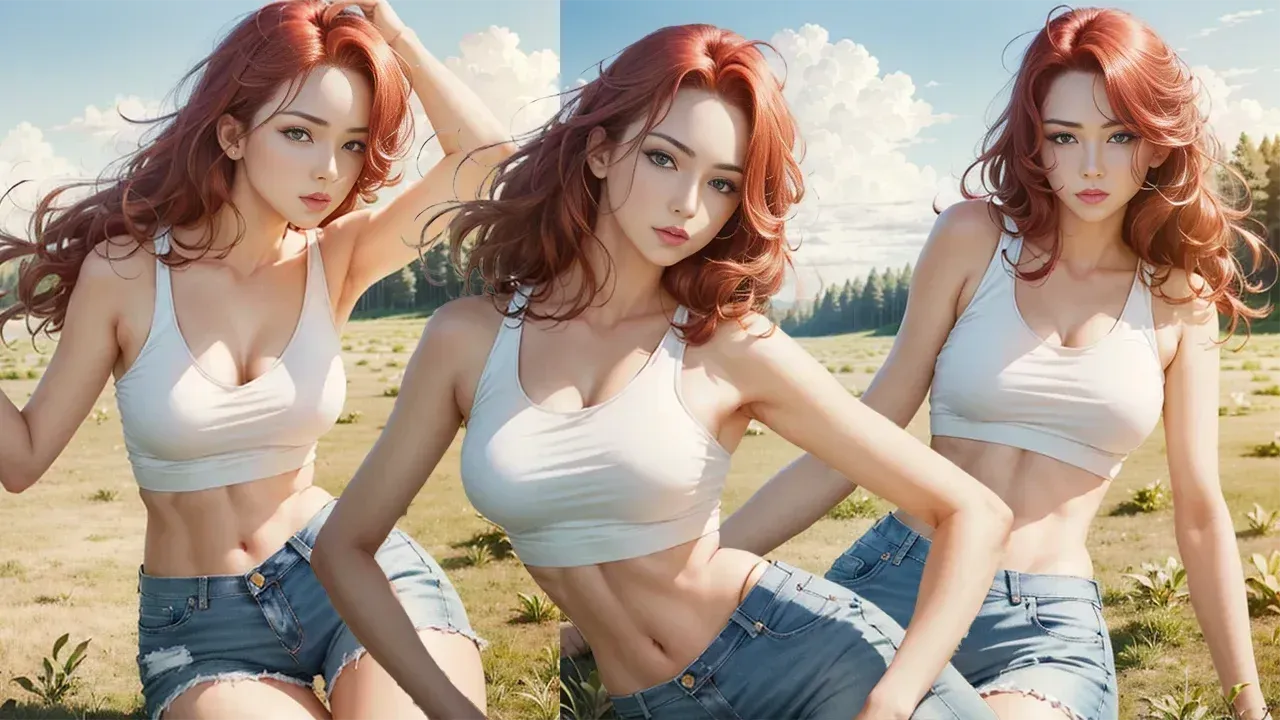
Table of Contents
1. Introduction
In today's digital landscape, the intersection of technology and creativity has birthed tools that allow us to perform tasks that were once deemed possible only in our wildest dreams. Among these tools is Stable Diffusion, a powerful AI model that excels in generating images from textual descriptions. Coupled with ControlNet, this transformative technology enables users to manipulate and generate impressive pose transformations. This blog post will provide a detailed guide on how to leverage these innovative tools for your creative projects, ensuring a seamless and user-friendly experience.
2. Requirements for Pose Changing
Before diving into the intricate world of pose transformations, it is essential to equip yourself with the right tools and resources. Here’s a checklist of what you’ll need:
-
Stable Diffusion: The core technology for generating images. We've created a clear installation guide on how to install stable diffusion on windows.
-
ControlNet & OpenPose Models: This tool enhances your ability to control and modify images, particularly for pose transformations. Here is a guide on How to Install ControlNet Extension in Stable Diffusion (A1111).
-
Initial Image: Prepare an initial image for manipulation or generate one using the text-to-image feature.

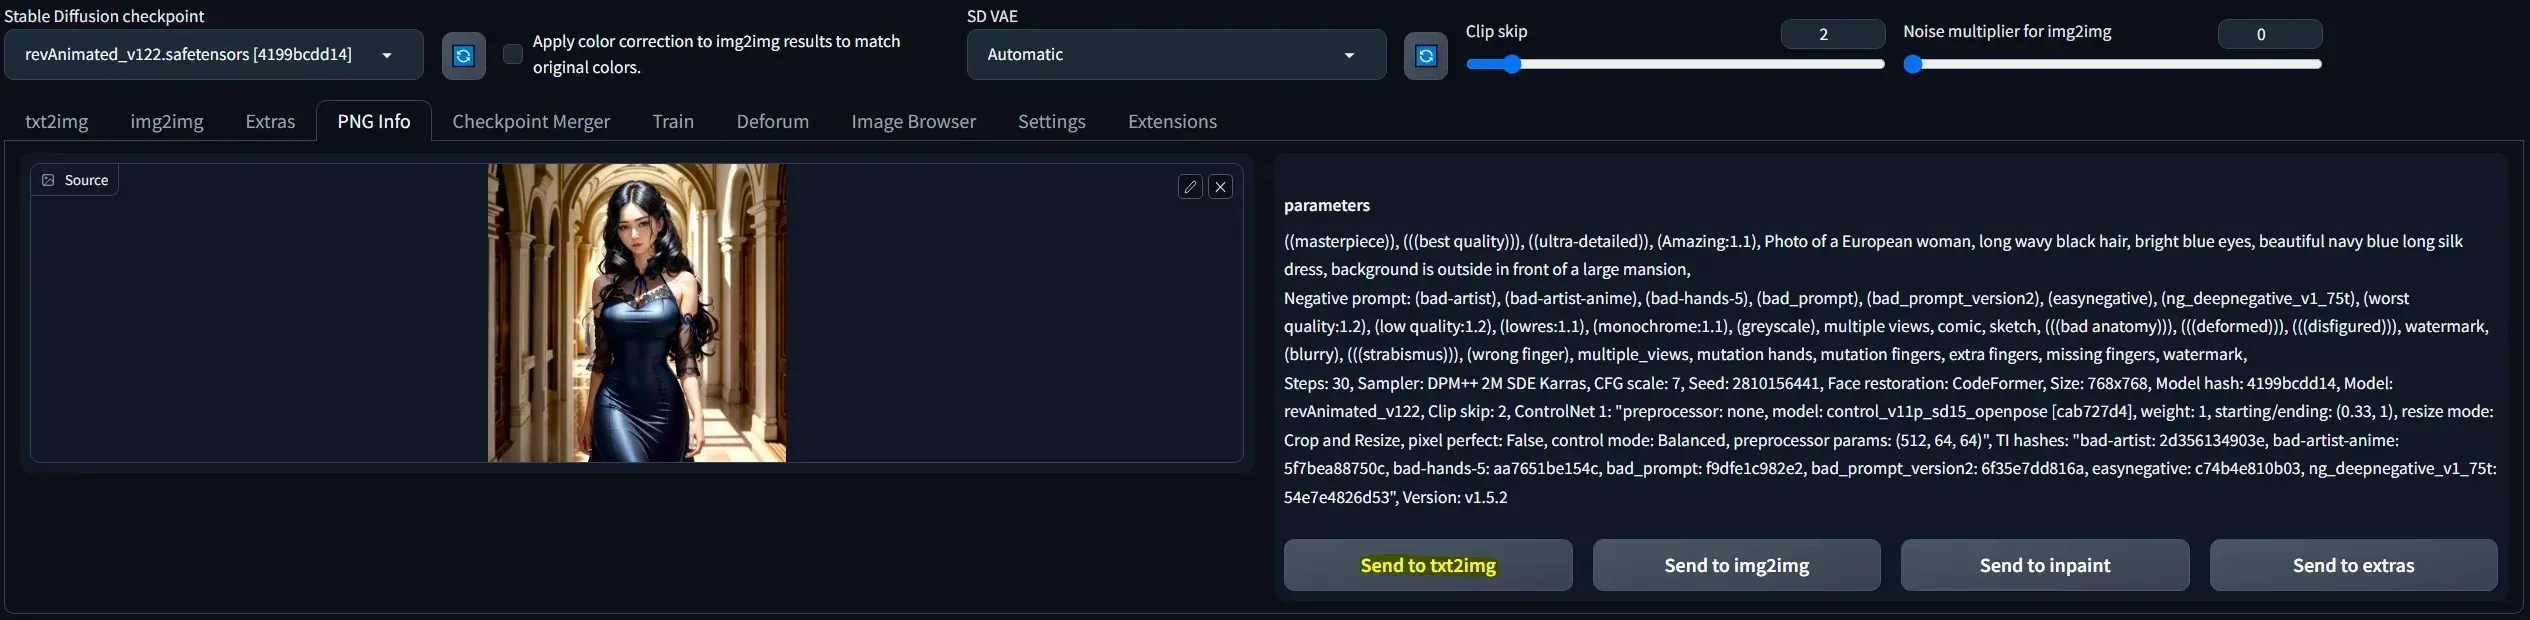
3. Txt2img Settings
If you want to change the pose of an image you have created with Stable Diffusion then the process is simple. Simply drag the image in the PNG Info tab and hit “Send to txt2img”. This will copy over all the settings used to generate the image.
If you want to change the pose of a different image then adjust the settings in the Txt2img tab accordingly:
-
Prompts: Describe the details of the image and add keywords, alternatively you can drag the image in the img2img tab and press the “Interrogate CLIP” or the “Interrogate DeepBooru” button. I found that the DeepBooru method gives a better result. This will generate a prompt based on the image, this does need some finetuning. Don’t forget to add a negative prompt.
-
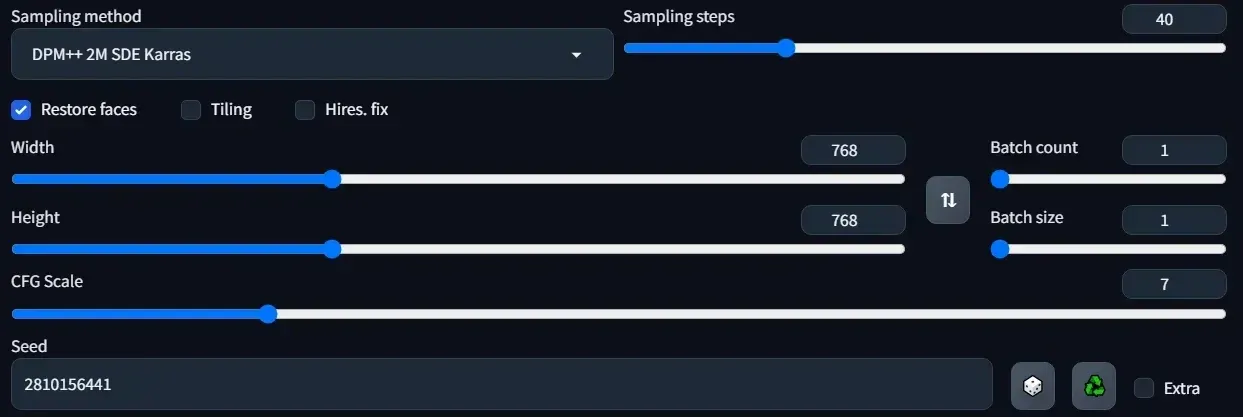
Sampling Method: This doesn’t matter too much, for photographs i recommend Euler a or DDIM. For more stylized images I recommend DPM++ 2M SDE Karras.
-
Sampling Steps: Set this to at least 30 or higher.
-
Width & Height: Use the same aspect ratio as your initial image. Don’t use too high values, a good maximum is somewhere between 768 and 1024.
-
CFG Scale: Use a balanced CFG scale of around 7,5.
Leave the rest of the settings untouched.
4. ControlNet Settings
We will be utilizing 2 ControlNet models so make sure you have Multi ControlNet set to at least 2. This can be done in the Settings tab and then click ControlNet on the left.
 ### ControlNet Unit 0
Firstly drag your initial image in the ControlNet Unit then change the following settings:
-
Control Type: Reference
-
Preprocessor: reference_only
-
Control Weight: Between 1 and 2, see what works best for you.
-
Control Mode: ControlNet is more important
Leave the rest of the settings at their default values.
 ### ControlNet Unit 1
Drag your openpose image in the ControlNet unit, I have a pack with dynamic poses available on civitAI for free. If you’re unfamiliar with open pose, I recommend watching our openpose crash course on youtube.
-
Control Type: OpenPose
-
Preprocessor: None (Alternatively you can upload any image in the ControlNet unit and use the “openpose” preproccesor)
-
Model: Use the sd15 model
-
Starting Control Step: Use a value between 0 and 0.2.
Leave the rest of the settings at their default values.
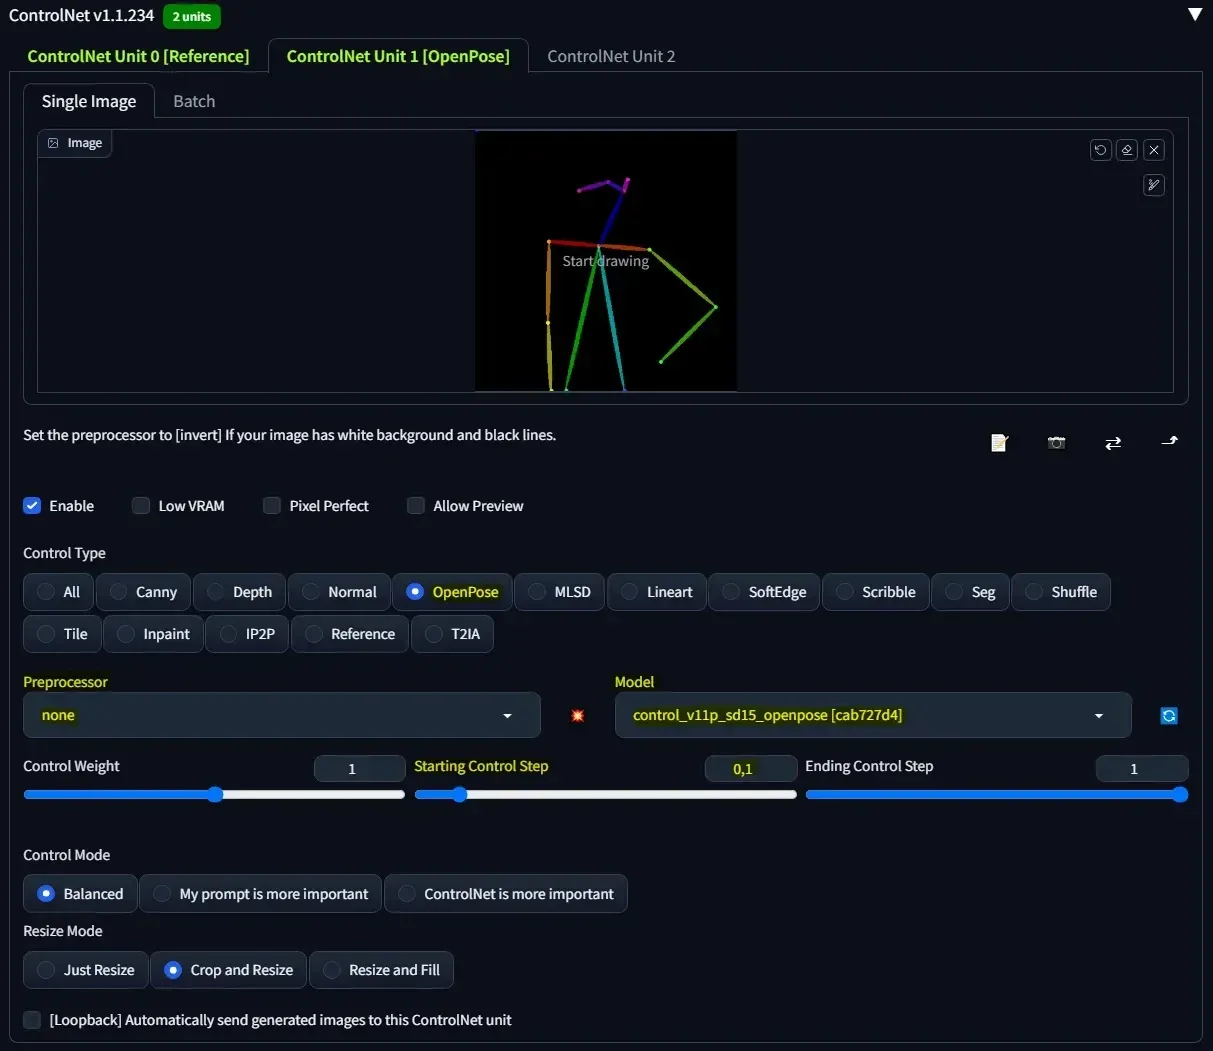 Now make sure both ControlNet units are enabled and hit generate!
5. Pose Changes Examples
Example 1

Example 2

6. Conclusion
In conclusion, the world of pose transformations powered by Stable Diffusion and Control Net opens up an unprecedented realm of creative opportunities. By mastering the installation processes, understanding the tools, and effectively managing your images and settings, you can achieve remarkable results in your artistic endeavors. As you venture further into this captivating territory, remember that experimentation and practice are key. Each project offers a new chance to explore and push the boundaries of your creativity. Join us in this tech adventure, and don’t forget to subscribe for more insights and guides into the ever-evolving world of technology.


